Unit tests validate the behavior of your code, and fast feedback is essential. This is where the Live Unit Testing feature in Visual Studio 2017 comes in. It runs tests in the background as soon as you save a file and displays the results directly in the code editor. Rather than running thousands of tests on every change, it only runs the tests affected by your modifications. Live unit testing tracks which parts of the code each test covers, so only the relevant tests run and feedback arrives quickly. Let's see how to use it.

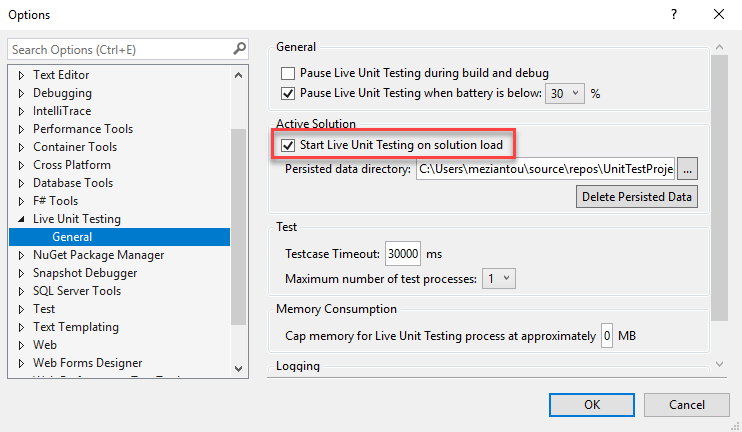
You can also configure it to start automatically when you open a solution, via the options window:
Let's use a simple method to test:
C#
public static string Nullify(string str, bool trim)
{
    if (str == null)
        return null;

    if (trim)
    {
        str = str.Trim();
    }

    if (string.IsNullOrEmpty(str))
        return null;

    return str;
}
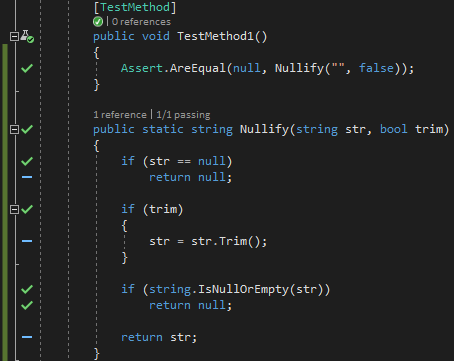
After enabling live unit testing, Visual Studio adds a blue dash in front of each line of the method, indicating the statement is not yet covered by any test.

After adding a test and saving the file, covered statements show a green check. Uncovered lines retain the blue dash.
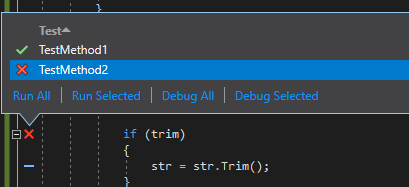
Now, let's add a failing test. A red cross appears in front of the affected lines, taking priority over other indicators. Clicking a red cross shows the details of each test covering that line.

You can easily debug the failing test by clicking the red cross:
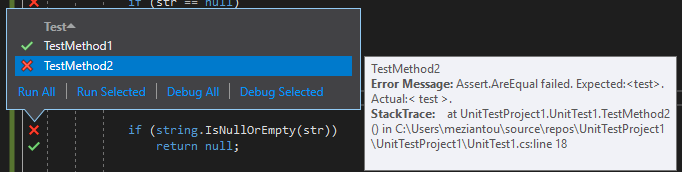
You can also see the details by hovering over a specific test:
#Conclusion
Live unit testing is a great productivity feature. You can see immediately, on each file save, which tests pass or fail and which parts of your code are covered. The only drawback is that it is available exclusively in the Enterprise edition of Visual Studio 2017.
Do you have a question or a suggestion about this post? Contact me!