This post is part of the series 'MSTest v2'. Be sure to check out the rest of the blog posts of the series!
Unit testing is a key part of the development process. If you are not yet writing unit tests, I recommend reading this post, which explains how testing helps you deliver faster and with more confidence: How we approach testing VSTS to enable continuous delivery. In this series of posts, we'll see how to write tests using MSTest v2, Microsoft's test framework.

#Create the test project
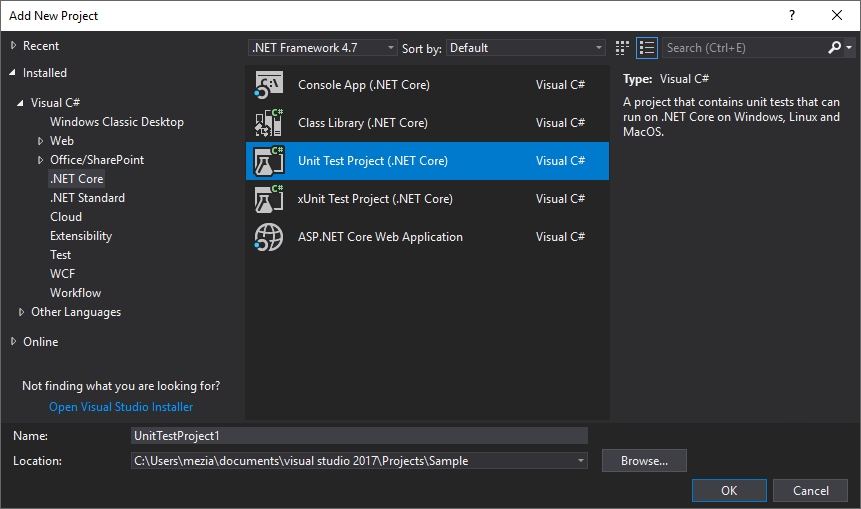
In Visual Studio, create a new "Unit Test Project" project:
If you want to use the command line in .NET Core, you can use the following command:
Shell
dotnet new mstest
The template contains the references to the following NuGet packages:
Microsoft.NET.Test.SdkMSTest.TestAdapterMSTest.TestFramework
The csproj file should contain the following lines:
csproj (MSBuild project file)
<ItemGroup>
  <PackageReference Include="Microsoft.NET.Test.Sdk" Version="15.5.0" />
  <PackageReference Include="MSTest.TestAdapter" Version="1.2.0" />
  <PackageReference Include="MSTest.TestFramework" Version="1.2.0" />
</ItemGroup>
#Create a test
To create a test, write a method decorated with the [TestMethod] attribute inside a class decorated with [TestClass]. The TestClass attribute may seem redundant, but its importance will be covered in a later post. You can use the methods of the Assert class to validate the behavior of the method under test.
C#
using Microsoft.VisualStudio.TestTools.UnitTesting;

[TestClass]
public class MathTests
{
    [TestMethod]
    public void Test_Add()
    {
        var actual = MathHelper.Add(1, 1);
        var expected = 2;
        Assert.AreEqual(expected, actual);
    }
}

public class MathHelper
{
    public static int Add(int a, int b) => a + b;
}
Note: The first argument of the Assert.AreEqual method is the expected value. If you swap the two arguments, the error message may be misleading.
You'll find many assert methods in the Assert, CollectionAssert, and StringAssert classes. These will be covered in a later post. Using the AssertXXX classes is not mandatory; a test fails whenever an exception is raised. However, Assert throws an exception with a formatted message containing the expected and actual values, making test results much easier to read.
#Run the tests from Visual Studio
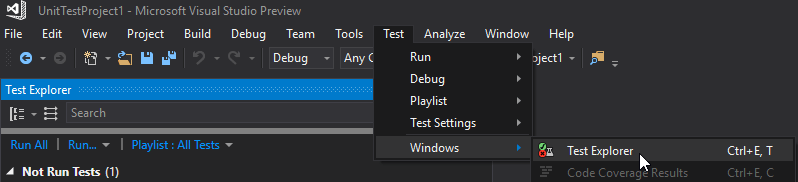
Now, you can run the test directly in Visual Studio. Open the Test Explorer window (Ctrl+E, T)
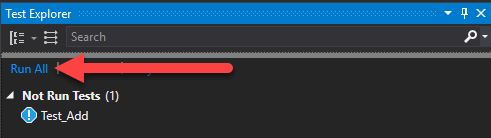
Since Visual Studio 2017 Update 5, the tests of the solution are discovered in real time. But if the tests are not visible, building the solution should make them visible. Once the test is visible, click the "Run All" button:
After a short time, the result of the test run is visible:
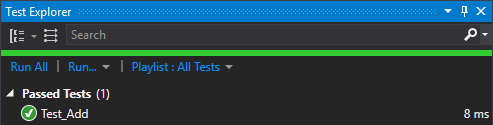
By default the tests are grouped by output result, so you can quickly find failed tests.
#Run the tests from the command line
If you are using .NET Core, you can run tests using the following command:
Shell
dotnet test

The full documentation of dotnet test is available in the documentation.
#Conclusion
You now have the basis to create and run unit tests written with MSTest v2. In the next posts, we'll explore the functionalities of MSTest v2 and Visual Studio. Stay tuned!
Do you have a question or a suggestion about this post? Contact me!