Blazor WebAssembly is officially released and ready for production use. It runs client-side C# code directly in the browser using WebAssembly, which means your application requires no server and can be published as a static website.
There are many options for hosting a static website, such as Azure Storage, AWS S3, Google Cloud Storage, and others. GitHub Pages is a free alternative as long as you do not run a high-traffic website (usage limits). You can also use Cloudflare free to reduce GitHub bandwidth usage.
#Creating the GitHub repository
First, create a repository on GitHub. The repository name determines the URL GitHub generates for your site. If you plan to use a custom domain, the repository name does not matter since you can map any repository to a custom URL. Without a custom domain, GitHub generates a URL as follows:
- Repository name:
<username>.github.io -> URL: https://<username>.github.io - Repository name:
demo -> URL: https://<username>.github.io/demo
Create your GitHub repository based on your needs.
#Creating the Blazor application
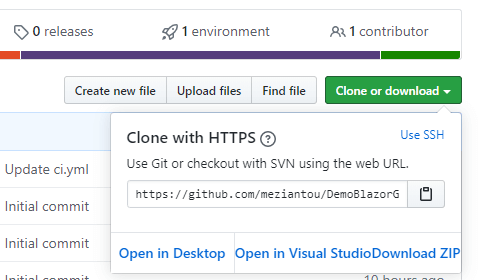
Clone the repository to your machine. You'll find the clone URL on your repository page:
Shell
git clone https://github.com/<username>/<projectname>.git
cd <projectname>
Create a new Blazor WebAssembly application:
Shell
dotnet new blazorwasm --name myapp --output .
Test the application:
Shell
dotnet run
If you deploy the website to a subfolder such as https://meziantou.github.io/DemoBlazorGitHubPages, you need to edit the file wwwroot/index.html to set the base URL:
HTML
<base href="/DemoBlazorGitHubPages/" />
You can automate this step using a .NET tool:
Shell
dotnet tool update --global Meziantou.Framework.Html.Tool
meziantou.html replace-value --file index.html        --xpath "//base/@href" --new-value "/DemoBlazorGitHubPages"
meziantou.html replace-value --file-pattern **/*.html --xpath "//base/@href" --new-value "/DemoBlazorGitHubPages"
#Publishing the application using GitHub Actions
To deploy the application, push the build artifacts to the gh-pages or master branch. GitHub Actions can automate this process whenever you push new changes.
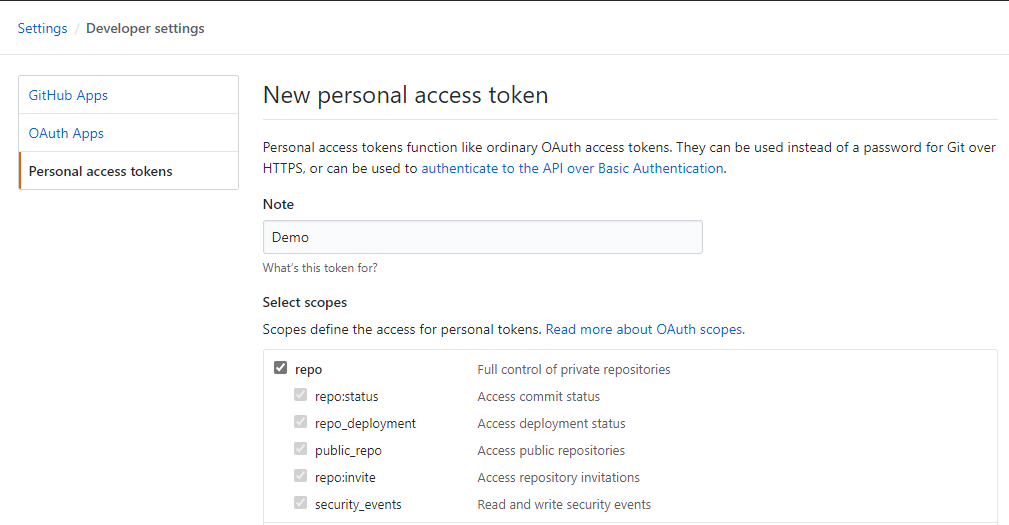
First, generate a personal access token to allow the action to push to the branch. Go to https://github.com/settings/tokens and create a token with the repo scope:
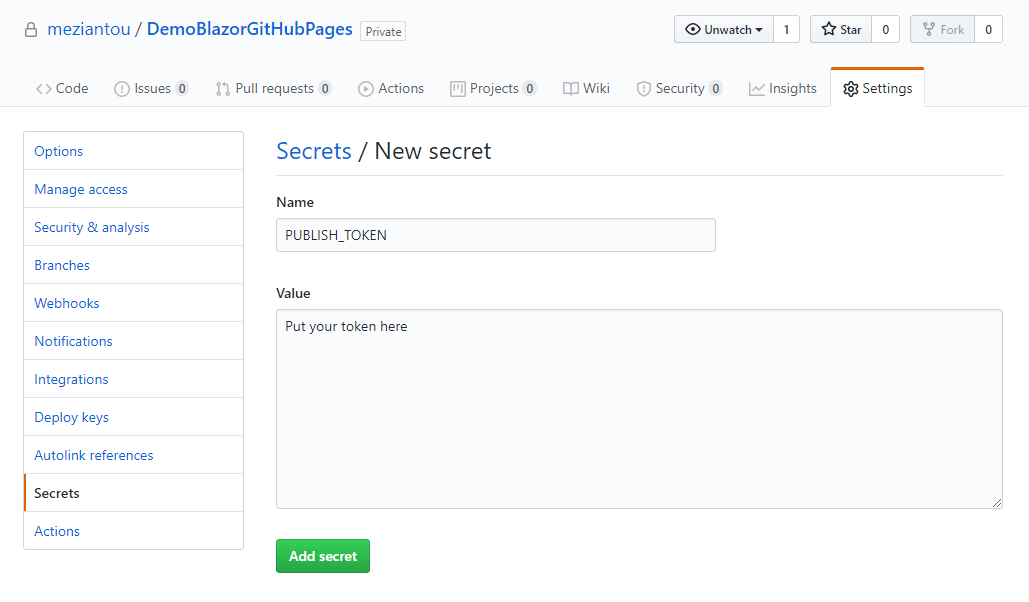
Then, create a repository secret so the action can use the token. Go to https://github.com/<username>/<projectname>/settings/secrets/new and add a secret named PUBLISH_TOKEN with the token you just created:
Then, add a new file named .github/workflows/ci.yml with the following content:
YAML
name: 'Publish application'
on: push

jobs:
  build:
    runs-on: ubuntu-latest
    steps:
        # Checkout the code
        - uses: actions/checkout@v2

        # Install .NET Core SDK
        - name: Setup .NET Core
          uses: actions/setup-dotnet@v2
          with:
            dotnet-version: 3.1.x

        # Run tests
        - name: Test
          run: dotnet test

        # Generate the website
        - name: Publish
          run: dotnet publish myapp.csproj --configuration Release

        # Publish the website
        - name: GitHub Pages action
          if: ${{ github.ref == 'refs/heads/master' }} # Publish only when the push is on master
          uses: peaceiris/actions-gh-pages@v3.6.1
          with:
            github_token: ${{ secrets.PUBLISH_TOKEN }}
            publish_branch: gh-pages
            publish_dir: bin/Release/netstandard2.1/publish/wwwroot
            allow_empty_commit: false
            keep_files: false
            force_orphan: true
            # TODO uncomment the following line if you have a custom domain name
            # cname: demo.meziantou.net
Then, push your changes to GitHub:
Shell
git add .
git commit -m "Initial commit"
git push
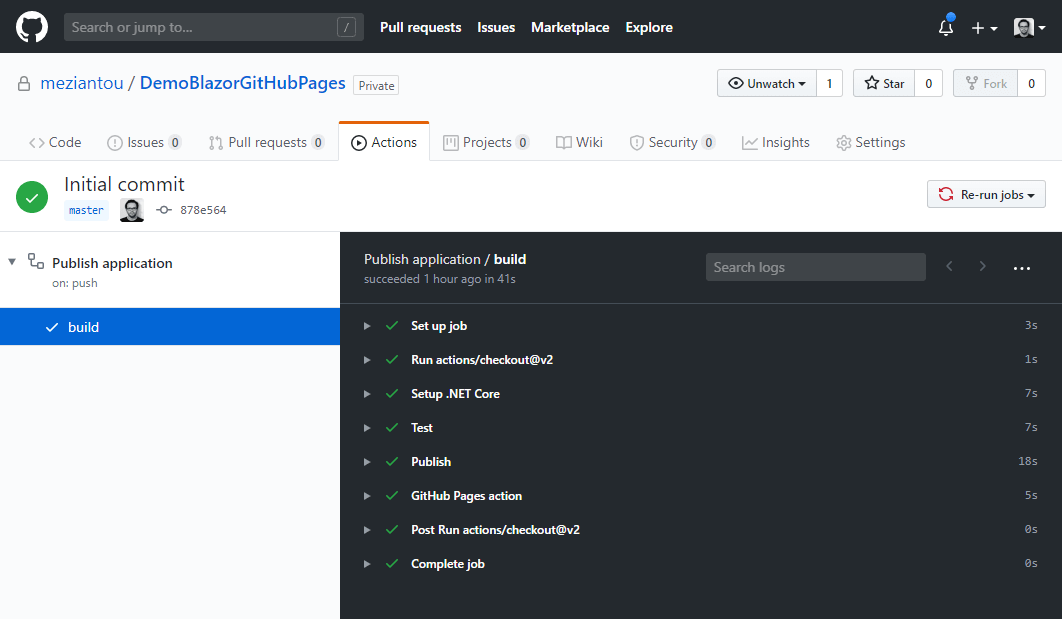
You can now check the status of the build pipeline at https://github.com/<username>/<projectname>/actions
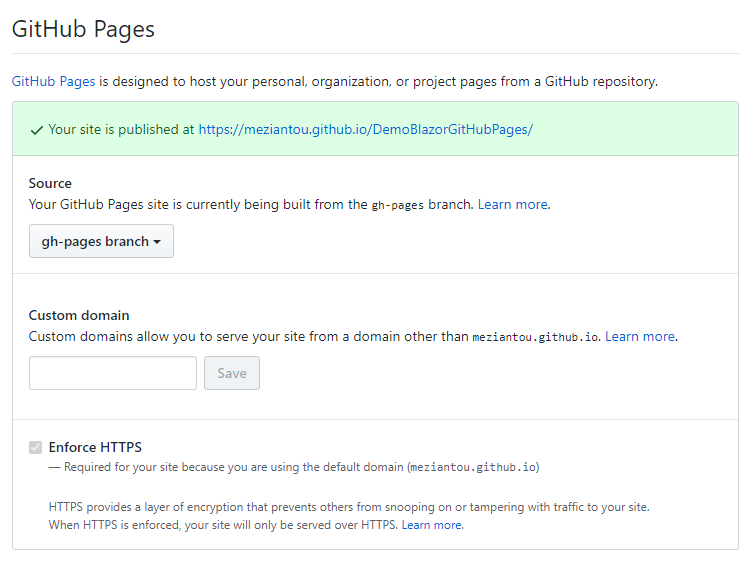
Finally, enable GitHub Pages in the repository settings by selecting the branch that contains your static files:
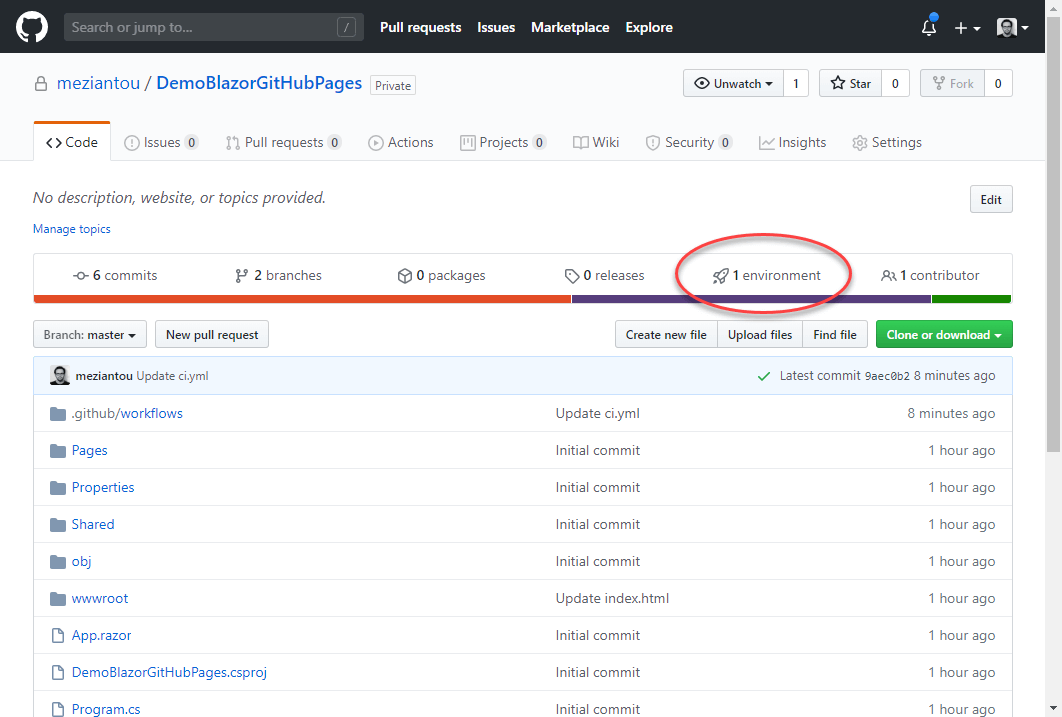
You should now see a new 1 environment tab on the repository home page:
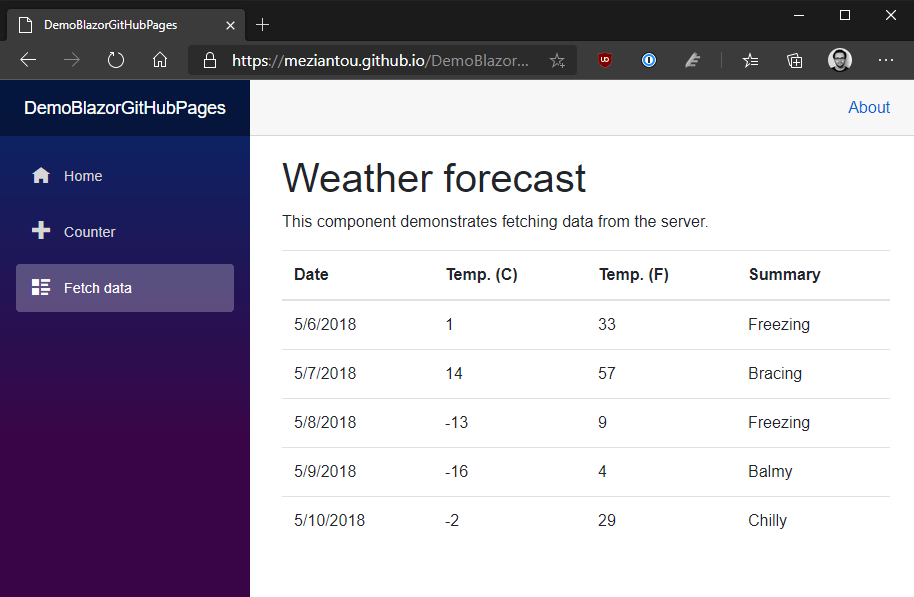
If everything looks good, click the "View deployment" button to see your application:
If the application fails to load, verify that the <base href="..."> value in wwwroot/index.html matches your actual base URL.
#Handling 404 errors
The website works when accessing the home page, but navigating directly to a page such as /fetchdata returns a 404 error.
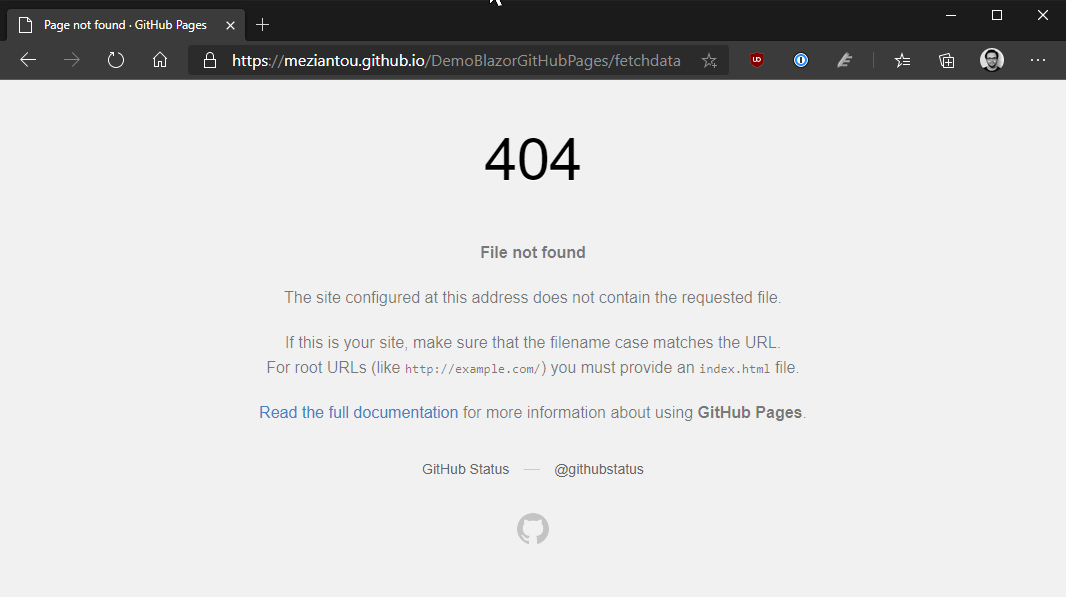
This happens because there is no HTML file with that name in the repository, so GitHub returns its default 404 error page. The fix is to serve index.html as the 404 page and let Blazor handle routing. You can copy the file manually or automate it in the CI pipeline.
YAML
        # Generate the website
        - name: Publish
          run: |
            cp wwwroot/index.html wwwroot/404.html
            dotnet publish myapp.csproj --configuration Release
Once the application is published, you can navigate to any page and press F5 to refresh without getting a 404 error.
#Conclusion
Deploying your Blazor WebAssembly application for free using GitHub Pages is straightforward. With GitHub Actions, every push to the main branch publishes a new version, making your changes available to users within minutes!
I have published two Blazor WebAssembly projects on GitHub Pages. You can check their workflows for more details:
Do you have a question or a suggestion about this post? Contact me!