This post explains how to create and publish a self-contained Blazor component as a NuGet package. A self-contained package includes the Blazor component (Razor + C#), the styles (CSS), and the JavaScript code. Consumers only need to reference the package and use the component – no manual CSS or JS file inclusion required.
Razor
@* The CSS and the JS are automatically included *@
<MyRazorClassLibrary.SayHello />
To create the component I'll use the following features of .NET 5:
If these features are new to you, read the linked posts before continuing.
#Creating the library
First, you need to create a new project. You can use the "Razor Class Library" template in Visual Studio or you can use the command line:
Shell
dotnet new razorclasslib --name MyRazorClassLibrary
The generated csproj file should look like:
csproj (MSBuild project file)
<Project Sdk="Microsoft.NET.Sdk.Razor">
  <PropertyGroup>
    <TargetFramework>net5.0</TargetFramework>
  </PropertyGroup>

  <ItemGroup>
    <SupportedPlatform Include="browser" />
  </ItemGroup>

  <ItemGroup>
    <PackageReference Include="Microsoft.AspNetCore.Components.Web" Version="5.0.0-rc.2.20475.17" />
  </ItemGroup>
</Project>
For the component, I'll reuse the example from my previous post about JS isolation. Let's start with the JS file. You can create a new JS file named wwwroot/demo.js. The files under the wwwroot folder are automatically embedded in the DLL when compiling and are accessible using the URL _content/<ProjectName>/<FileName>.
JavaScript
// wwwroot/demo.js
export function sayHi(name) {
    alert(`hello ${name}!`);
}
Let's create a new file named SayHello.razor. This component uses JSRuntime and IJSObjectReference to import the JS file dynamically and call its methods, as explained in the JS isolation post. Make sure to update the ImportPath value to match your library name.
Razor
@using Microsoft.JSInterop
@using Microsoft.AspNetCore.Components.Web
@using Microsoft.AspNetCore.Components.Forms

@inject IJSRuntime JSRuntime
@implements IAsyncDisposable

Enter your name:
<input @bind="name" />
<button @onclick="Submit">Submit</button>

@code {
    private string name;
    private Task<IJSObjectReference> _module;

    @* TODO: You need to replace MyRazorClassLibrary with the actual name of your library *@
    const string ImportPath = "./_content/MyRazorClassLibrary/demo.js";
    private Task<IJSObjectReference> Module => _module ??= JSRuntime.InvokeAsync<IJSObjectReference>("import", ImportPath).AsTask();

    async Task Submit()
    {
        var module = await Module;
        await module.InvokeVoidAsync("sayHi", name);
    }

    public async ValueTask DisposeAsync()
    {
        if (_module != null)
        {
            var module = await _module;
            await module.DisposeAsync();
        }
    }
}
Finally, define the component's style using CSS isolation to scope the styles to this component only. This ensures the style is applied correctly when the component is used in another project. Create a file named SayHello.razor.css with the following content:
CSS
button {
    color: green;
}
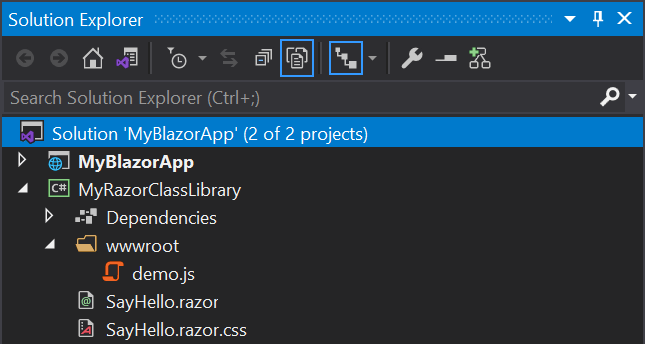
Your project should look like:
#Publishing the NuGet package
The component is now ready to publish. Use the dotnet CLI to package and push it to NuGet.org:
.NET 5.0 RC1 only: Edit the csproj to exclude the isolated CSS files from the NuGet package (this is fixed in RC2)
csproj (MSBuild project file)
<!-- Only on .NET 5.0 RC1, not needed with .NET 5.0 RC2 -->
<ItemGroup>
    <None Update="**/*.razor.css" Pack="false" />
</ItemGroup>
Build the NuGet package using dotnet pack. This outputs the package to the bin/Release folder.
Shell
dotnet pack MyRazorClassLibrary.csproj --configuration Release
Publish the NuGet package to nuget.org. You first need to create an API key on nuget.org.
Shell
dotnet nuget push bin/Release/MyRazorClassLibrary.1.0.0.nupkg --api-key "<your api key>" --source https://api.nuget.org/v3/index.json
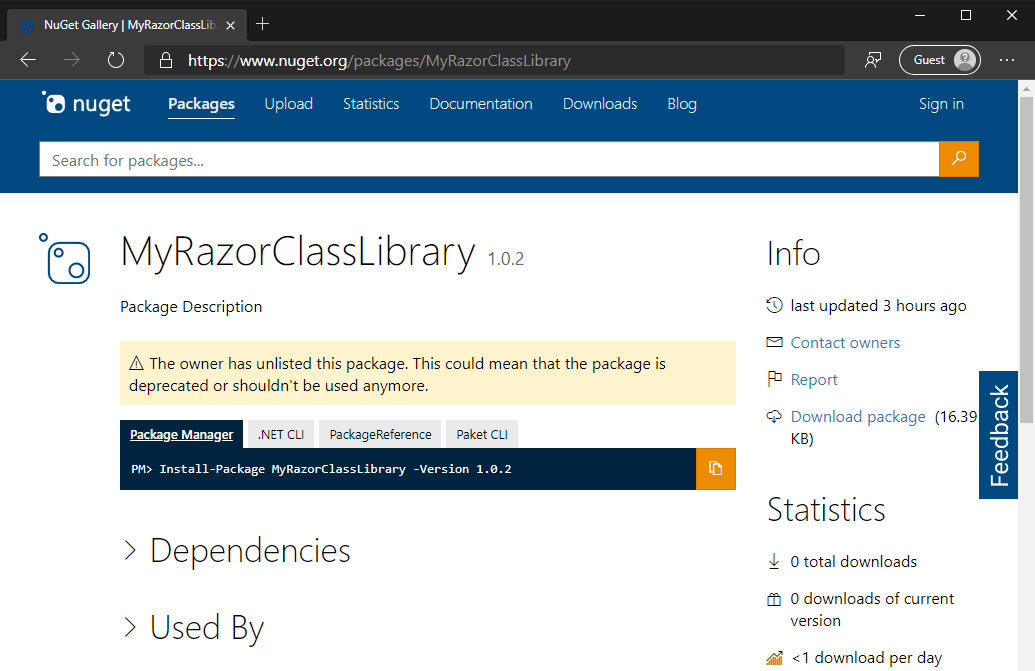
If everything succeeds, your package is available on nuget.org:
#Consuming the library
You can now use your library in a Blazor application. First, add a reference to the NuGet package:
csproj (MSBuild project file)
<Project Sdk="Microsoft.NET.Sdk.BlazorWebAssembly">
  <PropertyGroup>
    <TargetFramework>net5.0</TargetFramework>
  </PropertyGroup>

  <ItemGroup>
    <PackageReference Include="Microsoft.AspNetCore.Components.WebAssembly" Version="5.0.0-rc.2.20475.17" />
    <PackageReference Include="Microsoft.AspNetCore.Components.WebAssembly.DevServer" Version="5.0.0-rc.2.20475.17" PrivateAssets="all" />
    <PackageReference Include="System.Net.Http.Json" Version="5.0.0-rc.2.20475.5" />
    <PackageReference Include="MyRazorClassLibrary" Version="1.0.2" />
  </ItemGroup>

</Project>
Then, you can use the component from the NuGet package in your application:
Razor
@page "/"

<h1>Hello, world!</h1>

Welcome to your new app.

<MyRazorClassLibrary.SayHello />
When you run the application, the component appears with green button text as defined by the scoped CSS. Clicking the button loads the JS file and displays the alert:
#Additional Resources
Do you have a question or a suggestion about this post? Contact me!