This website is hosted on a static website hosting provider, and I use Cloudflare CDN to improve performance. These two services let me host the site for free, even as visitor counts grow. However, I have limited analytics visibility. For example, I want to know where users come from via the HTTP Referer header, or whether they hit a 404. Google Analytics can help, but most users have an adblocker, and it does not work well with 404 pages. Application Insights, among other features, can track requests. In this post, we'll see how to integrate Application Insights into Cloudflare.
Cloudflare Workers allow you to handle requests and serve responses to the client. If you are familiar with Azure, Cloudflare Workers are similar to Azure Functions. Using Workers, you can serve content from your origin server and track requests in Application Insights.
To deal with Cloudflare Workers, you need to install wrangler:
Shell
npm install -g @cloudflare/wrangler
wrangler login
Then, you can generate the project:
Shell
wrangler generate application-insights
This will create a folder with a few files. The most important ones are index.js, package.json, and wrangler.toml. You can edit the index.js file with the following content:
TypeScript
const applicationInsightsKey = "<TODO Application Insights Instrumentation Key>";
const requestDataEventName = `Microsoft.ApplicationInsights.${applicationInsightsKey.replace(/-/g, '')}.RequestData`;

addEventListener("fetch", event => {
    // https://developers.cloudflare.com/workers/learning/fetch-event-lifecycle
    event.passThroughOnException();
    event.respondWith(processRequest(event));
});

async function processRequest(event) {
    const request = event.request;
    const response = await fetch(request);

    // Prevent the worker to stop before sending the data to Application Insights
    // https://developers.cloudflare.com/workers/learning/fetch-event-lifecycle#waituntil
    event.waitUntil(trackRequest(request, response));

    return response;
}

function trackRequest(request, response) {
    // Allowed Application Insights payload: https://github.com/microsoft/ApplicationInsights-JS/tree/61b49063eeacda7878a1fda0107bde766e83e59e/legacy/JavaScript/JavaScriptSDK.Interfaces/Contracts/Generated
    const body = {
        iKey: applicationInsightsKey,
        name: requestDataEventName,
        time: new Date(),
        tags: {
            // Allowed tags: https://github.com/microsoft/ApplicationInsights-JS/blob/17ef50442f73fd02a758fbd74134933d92607ecf/legacy/JavaScript/JavaScriptSDK.Interfaces/Contracts/Generated/ContextTagKeys.ts#L208
            // Set the client_ip
            "ai.location.ip": request.headers.get("CF-Connecting-IP"),
        },
        data: {
            baseType: "RequestData",
            baseData: {
                ver: 2,
                id: generateUniqueId(),
                properties: {
                    // You can add more properties if needed
                    HttpReferer: request.headers.get("Referer")
                },
                measurements: {},
                responseCode: response.status,
                success: response.status >= 200 && response.status < 400,
                url: request.url,
                source: request.headers.get("CF-Connecting-IP") || "",
                duration: 1 // Cloudflare doesn't allow to measure duration. performance.now() is not implemented, and new Date() always return the same value
            }
        }
    };

    return fetch('https://dc.services.visualstudio.com/v2/track', {
        method: 'POST',
        body: JSON.stringify([body]),
    });
}

function generateUniqueId() {
    function chr4() { return Math.random().toString(16).slice(-4); }
    return chr4() + chr4() + '-' + chr4() + '-' + chr4() + '-' + chr4() + '-' + chr4() + chr4() + chr4();
}
The worker code is complete. Before publishing the project to Cloudflare, you will need to update the account_id and zone_id fields in the wrangler.toml file. You can find account_id in the right sidebar of your account's Workers page, and zone_id in the right sidebar of a zone's overview tab at https://dash.cloudflare.com.
Once you have filled both fields, you can publish the project:
Shell
wrangler publish
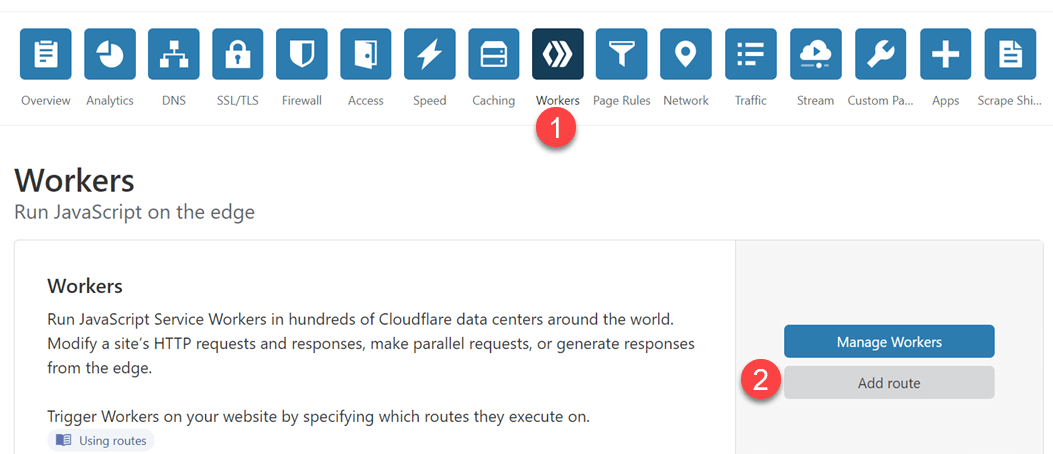
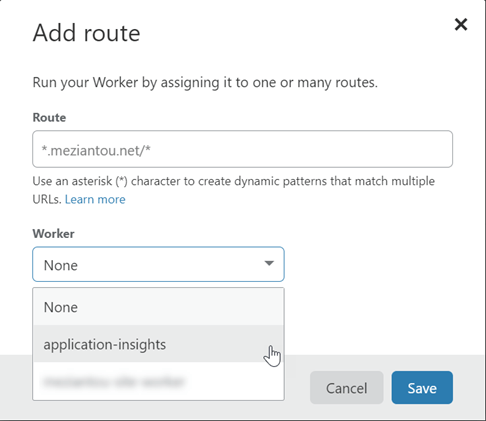
Finally, you need to associate the worker with your website. Go to the Workers page and click the "Add route" button. Enter the route:
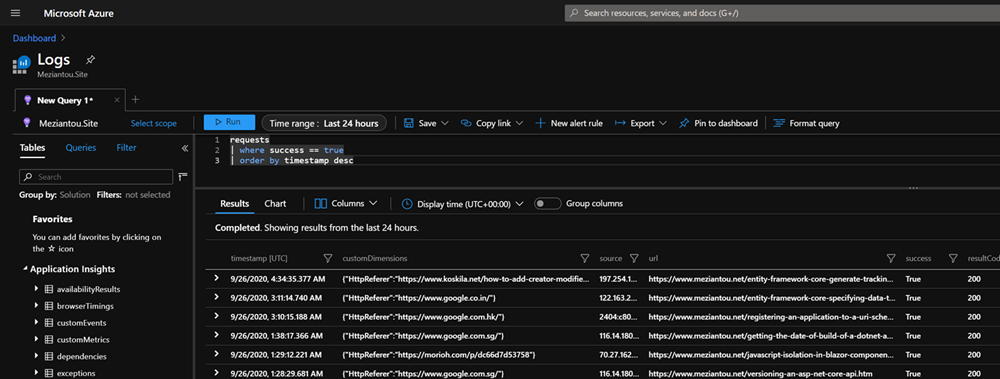
You can now see the requests in Application Insights:
Do you have a question or a suggestion about this post? Contact me!