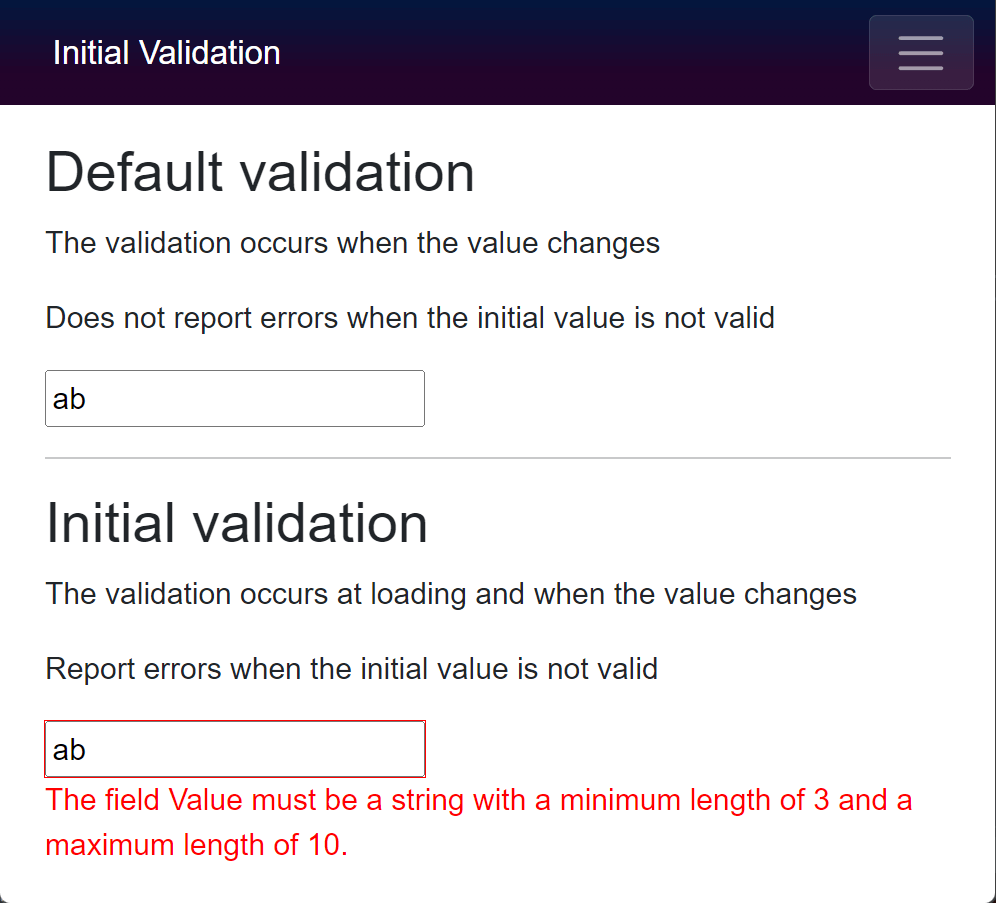
Laurent Kempé asked on DevApps, a French .NET community, how to validate a form on the first render in ASP.NET Core Blazor. This is useful when loading draft data where you want to show validation errors immediately. By default, Blazor only validates fields when their value changes, so you need to override this behavior to trigger validation on the first render.
#How validation works in Blazor
Blazor stores the state of the form in an EditContext instance. The <EditForm> component creates an EditContext implicitly. You can also create your own EditContext if you need more control over the validation lifecycle.
The EditContext exposes several methods and events to manage validation:
OnFieldChanged: An event that is raised when a field value changes. Validators use this event to validate a field as soon as the value changes.OnValidationRequested: An event that is raised when validation is requested using the Validate method.OnValidationStateChanged: An event that is raised when the validation state has changed. This event is mainly used by the <ValidationSummary> and <ValidationMessage> components to update the validation message when the status changes.bool Validate(): Raises the OnValidationRequested event and returns true if the form is valid, false otherwise.
When the validation is requested, you can use a ValidationMessageStore object to store error messages. Components such as <ValidationSummary> and <ValidationMessage> use this object to get the validation messages and display them.
Here's an example of how to use the EditContext and ValidationMessageStore to validate a form:
Razor
<EditForm EditContext="editContext">
    <InputText @bind-Value="model.Value" />
    <ValidationMessage For="() => model.Value" />

    <button type="button" @onclick="() => editContext.Validate()">Validate Form</button>
</EditForm>

@code {
    Model model;
    EditContext editContext;
    ValidationMessageStore messageStore;

    protected override void OnInitialized()
    {
        model = new Model();
        editContext = new EditContext(model);
        messageStore = new ValidationMessageStore(editContext);
        editContext.OnValidationRequested += OnValidationRequested;
    }

    private void OnValidationRequested(object sender, ValidationRequestedEventArgs e)
    {
        messageStore.Clear();
        if (string.IsNullOrEmpty(model.Value))
        {
            messageStore.Add(() => model.Value, "Value is required");
        }
    }
}
Instead of implementing the logic manually, you can use the <DataAnnotationsValidator> component to validate the form using data annotation attributes. This component subscribes to the EditContext events to validate the form when a value changes.
Razor
<EditForm Model="model">
    <DataAnnotationsValidator />
    <InputText @bind-Value="model.Value" />
    <ValidationMessage For="() => model.Value" />
</EditForm>
We now understand how to use the EditContext to validate the form. Let's see how to validate a form on the first render!
#Method 1: Calling Validate in OnAfterRender
The first approach is to call Validate in the OnAfterRender method. You can get a reference to the EditForm using @ref to access its EditContext, then call Validate manually. Because the editForm field is only set during the first render, OnAfterRender is the right place to do this:
Razor
<EditForm Model="model" @ref="editForm">
    <DataAnnotationsValidator />
    <InputText @bind-Value="model.Value" />
    <ValidationMessage For="() => model.Value" />
</EditForm>

@code {
    Model model = new();
    EditForm editForm; // Set by @ref during Render

    protected override void OnAfterRender(bool firstRender)
    {
        if (firstRender)
        {
            editForm.EditContext.Validate();
        }

        base.OnAfterRender(firstRender);
    }
}
The downside of this method is that it requires two renders to display error messages: the first to render the form and set the EditForm reference, and the second to show the validation errors.
#Method 2: Using an EditContext
The second solution is to manually create an EditContext instance and validate the form during the initialization phase. As the component is not yet rendered, the validators are not registered yet. So, if you call Validate, no validation occurs. You need to manually register the validator using EnableDataAnnotationsValidation().
Razor
@implements IDisposable

<EditForm EditContext="editContext">
    <InputText @bind-Value="model.Value" />
    <ValidationMessage For="() => model.Value" />
</EditForm>

@code {
    Model model;
    EditContext editContext;
    IDisposable dataAnnotationRegistration;

    protected override void OnInitialized()
    {
        model = new Model();
        editContext = new EditContext(model);
        dataAnnotationRegistration = editContext.EnableDataAnnotationsValidation();
        editContext.Validate();
    }

    public void Dispose()
    {
        dataAnnotationRegistration?.Dispose();
    }
}
There is a little more code, but this time there is only one render call to display the form and the error messages.
#Method 3 (recommended): Creating a new component
Method 2 works, but you need to repeat the same logic for every form. If you have many forms, you can extract that logic into a reusable component.
InitialValidator.cs (C#)
public class InitialValidator : ComponentBase
{
    // Get the EditContext from the parent component (EditForm)
    [CascadingParameter]
    private EditContext CurrentEditContext { get; set; }

    protected override void OnParametersSet()
    {
        CurrentEditContext?.Validate();
    }
}
Razor
<EditForm Model="model">
    <DataAnnotationsValidator />
    <InitialValidator />

    <InputText @bind-Value="model.Value" />
    <ValidationMessage For="() => model.Value" />
</EditForm>

@code {
    Model model = new();
}
This component is reusable and the form renders only once, so adding initial validation is straightforward with no flickering issues 😃
#Additional resources
Do you have a question or a suggestion about this post? Contact me!