This post is part of the series 'Roslyn Analyzers'. Be sure to check out the rest of the blog posts of the series!
Roslyn is the C# and VB.NET compiler. It also provides language services that IDEs can use, such as refactorings, code fixes, and edit-and-continue. If you are not familiar with Roslyn, you should read the following post to discover the scope of Roslyn.

Roslyn analyzers let you use Roslyn's data to inspect code and detect issues. An analyzer can add errors, warnings, or squiggles directly in the editor. For instance, you can create an analyzer to help users follow the best practices for your library, such as for the logging library of ASP.NET Core or FakeItEasy. Analyzers can also fix code automatically. They can even extend the editor by adding refactorings. For example, you can reverse an if statement or generate a missing switch case for an enumeration.
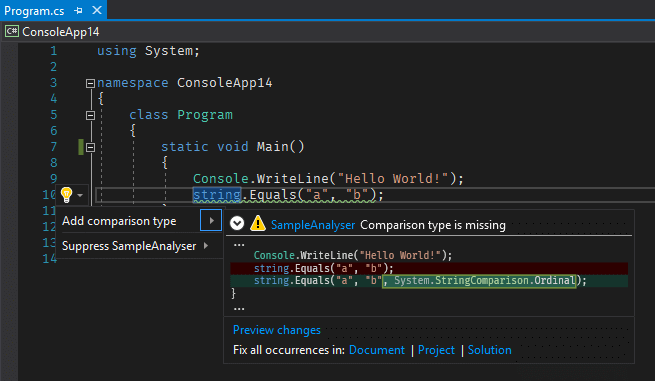
In this post, we'll see how to write a Roslyn Analyzer to report string.Equals(a, b) as a warning and suggest replacing it with string.Equals(a, b, StringComparison.Ordinal), which is more explicit.
 Analyzer sample
#Preparing Visual Studio
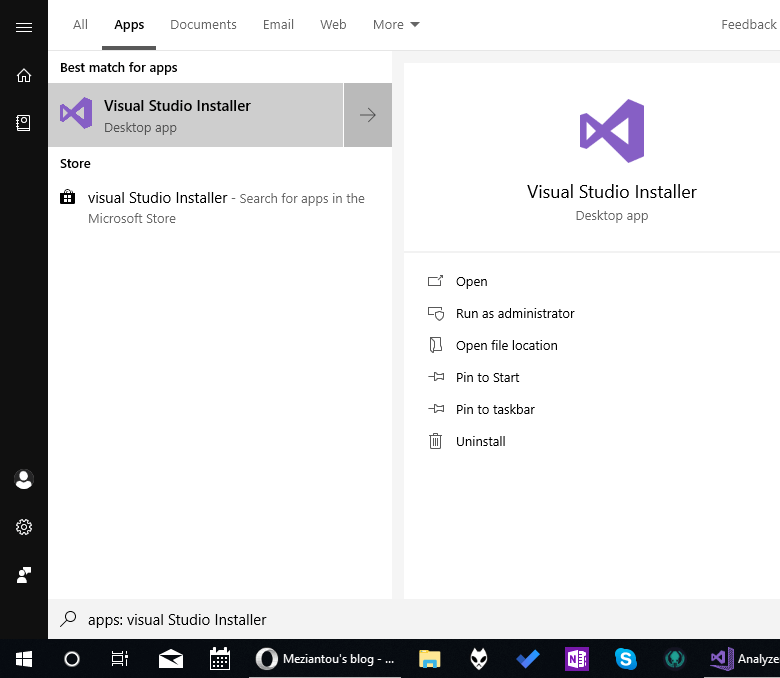
To create a Roslyn Analyzer project, you need to install the Visual Studio extension development workload.
Open the Visual Studio Installer
 Open the Visual Studio Installer
Check "Visual Studio extension development"
 Check Visual Studio extension development is installed
Click the Modify button
After a few seconds/minutes, Visual Studio should be ready.
#Creating the analyzer
Now, you can create an analyzer project:
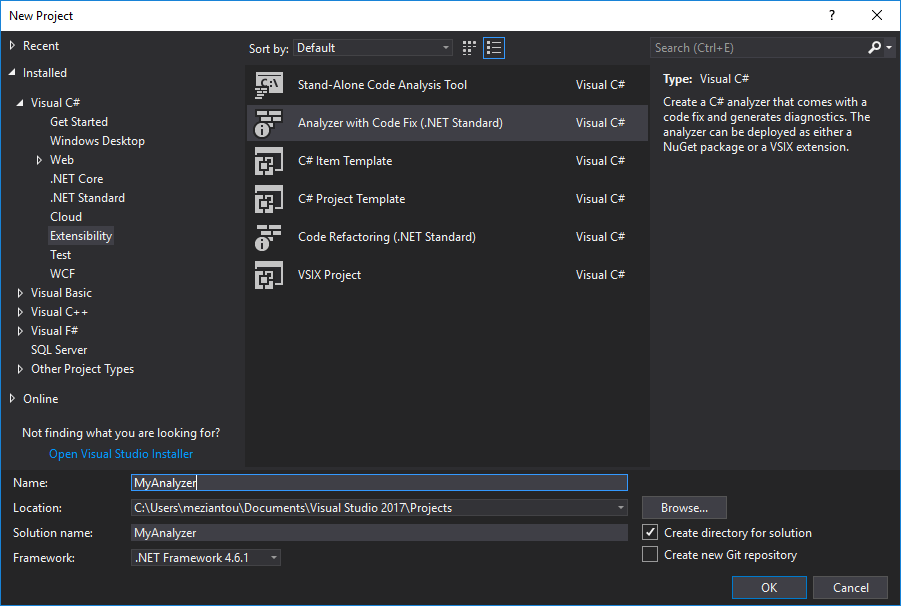 Create a new Roslyn analyzer project
The solution contains 3 projects:
 Created solution
MyAnalyzer: contains the analyzer code. It can be published as a NuGet package and consumed by other projects.MyAnalyzer.Vsix: contains the code to create the Visual Studio extension that will enable your analyzer.MyAnalyzer.Tests: contains unit tests for your analyzer.
Let's open the analyzer file and edit the metadata of the rule:
C#
[DiagnosticAnalyzer(LanguageNames.CSharp)]
public class MyAnalyzer : DiagnosticAnalyzer
{
    // Metadata of the analyzer
    public const string DiagnosticId = "SampleAnalyzer";

    // You could use LocalizedString but it's a little more complicated for this sample
    private static readonly string Title = "Specify StringComparison in String.Equals";
    private static readonly string MessageFormat = "StringComparison is missing";
    private static readonly string Description = "Ensure you compare strings the way it is expected";
    private const string Category = "Usage";

    private static readonly DiagnosticDescriptor Rule = new DiagnosticDescriptor(DiagnosticId, Title, MessageFormat, Category, DiagnosticSeverity.Warning, isEnabledByDefault: true, description: Description);

    // Register the list of rules this DiagnosticAnalizer supports
    public override ImmutableArray<DiagnosticDescriptor> SupportedDiagnostics { get { return ImmutableArray.Create(Rule); } }
}
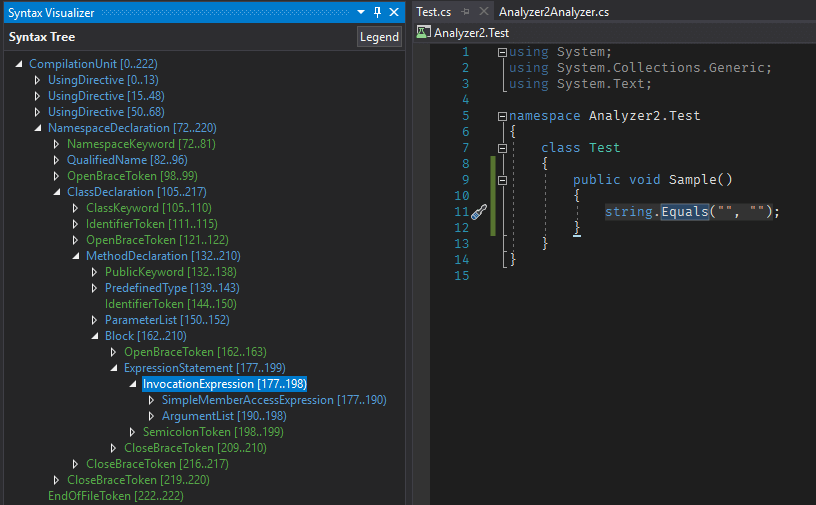
Now, we have to declare which part of the C# document the analyzer will analyze. If you don't know exactly the type of element, you can open the Syntax Visualizer (menu View > Other Windows > Roslyn Syntax Visualizer). It is a window in Visual Studio that shows the syntax tree of the current document and highlights the currently selected node. In our case, you can see that we are interested in the InvocationExpression syntax nodes.
 Roslyn Syntax Visualizer
Let's modify the Initialize method to instruct Roslyn to call the analyzer for each InvocationExpression node:
C#
    public override void Initialize(AnalysisContext context)
    {
        // The AnalyzeNode method will be called for each InvocationExpression of the Syntax tree
        context.RegisterSyntaxNodeAction(AnalyzeNode, SyntaxKind.InvocationExpression);
    }
In the method AnalyzeNode, you have access to the InvokeExpression node. You can access the properties of this node to check the method is actually string.Equals, and the comparisonType argument is not specified. Importantly, you can also access the semantic model from a syntax node, which is useful for getting the type of variables.
C#
    private void AnalyzeNode(SyntaxNodeAnalysisContext context)
    {
        var invocationExpr = (InvocationExpressionSyntax)context.Node;

        // invocationExpr.Expression is the expression before "(", here "string.Equals".
        // In this case it should be a MemberAccessExpressionSyntax, with a member name "Equals"
        var memberAccessExpr = invocationExpr.Expression as MemberAccessExpressionSyntax;
        if (memberAccessExpr == null)
            return;

        if (memberAccessExpr.Name.ToString() != nameof(string.Equals))
            return;

        // Now we need to get the semantic model of this node to get the type of the node
        // So, we can check it is of type string whatever the way you define it (string or System.String)
        var memberSymbol = context.SemanticModel.GetSymbolInfo(memberAccessExpr).Symbol as IMethodSymbol;
        if (memberSymbol == null)
            return;

        // Check the method is a member of the class string
        if (memberSymbol.ContainingType.SpecialType != SpecialType.System_String)
            return;

        // If there are not 3 arguments, the comparison type is missing => report it
        // We could improve this validation by checking the types of the arguments, but it would be a little longer for this post.
        var argumentList = invocationExpr.ArgumentList;
        if ((argumentList?.Arguments.Count ?? 0) == 2)
        {
            var diagnostic = Diagnostic.Create(Rule, invocationExpr.GetLocation());
            context.ReportDiagnostic(diagnostic);
        }
    }
}
If you run the VSIX project, you'll see that the analyzer works as expected. However, it's important to add unit tests to quickly validate every case works as expected. The template provides helper methods for testing the analyzer. Each test consists of a string containing the C# code to analyze and a list of expected diagnostics.
C#
[TestClass]
public class UnitTest : CodeFixVerifier
{
    protected override DiagnosticAnalyzer GetCSharpDiagnosticAnalyzer()
    {
        return new MyAnalyzer();
    }

    [TestMethod]
    public void StringComparisonIsMissing_ShouldReportDiagnostic()
    {
        var test = @"
class TypeName
{
    public void Test()
    {
        var a = ""test"";
        System.String.Equals(a, ""v"");
    }
}";
        var expected = new DiagnosticResult
        {
            Id = "SampleAnalyzer",
            Message = "StringComparison is missing",
            Severity = DiagnosticSeverity.Warning,
            Locations =
                new[]
                {
                    // Test0.cs is the name of the file created by VerifyCSharpDiagnostic
                    new DiagnosticResultLocation("Test0.cs", line: 7, column: 9)
                }
        };

        VerifyCSharpDiagnostic(test, expected);
    }
}
The analyzer works as expected. As a user, however, you may also want to fix the code automatically.
#Creating the code fix provider
Once your analyzer has reported a diagnostic, you can resolve the issue automatically using a CodeFixProvider. A CodeFixProvider produces a new syntax tree with the fix applied to the current document. In our case, it will consist of adding the comparison type argument to the InvocationExpressionSyntax. If you look at the first screenshot, you may have noticed that Roslyn shows the diff in the preview window. Roslyn computes this diff between the current document and the one produced by your CodeFixProvider, so this preview comes for free.
C#
// add this "using static" to easily create syntax nodes
using static Microsoft.CodeAnalysis.CSharp.SyntaxFactory;

[ExportCodeFixProvider(LanguageNames.CSharp, Name = nameof(MyAnalyzerCodeFixProvider)), Shared]
public class MyAnalyzerCodeFixProvider : CodeFixProvider
{
    // The name as it will appear in the light bulb menu
    private const string title = "Add comparison type";

    // The list of rules the code fix can handle
    public sealed override ImmutableArray<string> FixableDiagnosticIds
    {
        get { return ImmutableArray.Create(MyAnalyzerAnalyzer.DiagnosticId); }
    }

    public sealed override FixAllProvider GetFixAllProvider()
    {
        // See https://github.com/dotnet/roslyn/blob/master/docs/analyzers/FixAllProvider.md for more information on Fix All Providers
        return WellKnownFixAllProviders.BatchFixer;
    }

    public sealed override async Task RegisterCodeFixesAsync(CodeFixContext context)
    {
        var root = await context.Document.GetSyntaxRootAsync(context.CancellationToken);

        var diagnostic = context.Diagnostics.First();
        var diagnosticSpan = diagnostic.Location.SourceSpan;

        // Find the type declaration identified by the diagnostic.
        var declaration = root.FindToken(diagnosticSpan.Start).Parent.AncestorsAndSelf().OfType<InvocationExpressionSyntax>().First();

        // Register a code action that will invoke the fix.
        context.RegisterCodeFix(
            CodeAction.Create(
                title: title,
                createChangedDocument: c => FixAsync(context.Document, declaration, c),
                equivalenceKey: title),
            diagnostic);
    }

    private async Task<Document> FixAsync(Document document, InvocationExpressionSyntax invocationExpr, CancellationToken cancellationToken)
    {
        // Create a new list of arguments with System.StringComparison.Ordinal
        var arguments = invocationExpr.ArgumentList.AddArguments(
            Argument(
                    MemberAccessExpression(
                        SyntaxKind.SimpleMemberAccessExpression,
                        QualifiedName(IdentifierName("System"), IdentifierName("StringComparison")),
                        IdentifierName("Ordinal"))));

        // Indicate to format the list with the current coding style
        var formattedLocal = arguments.WithAdditionalAnnotations(Formatter.Annotation);

        // Replace the old local declaration with the new local declaration.
        var oldRoot = await document.GetSyntaxRootAsync(cancellationToken);
        var newRoot = oldRoot.ReplaceNode(invocationExpr.ArgumentList, formattedLocal);

        return document.WithSyntaxRoot(newRoot);
    }
}
The template also contains a helper to test the CodeFixProvider: VerifyCSharpFix(string source, string expected). You can call it with the source code and the expected code to verify the fix produces the expected output.
C#
[TestClass]
public class UnitTest : CodeFixVerifier
{
    protected override CodeFixProvider GetCSharpCodeFixProvider()
    {
        return new MyAnalyzerCodeFixProvider();
    }

    [TestMethod]
    public void TestMethod2()
    {
        var test = @"
class TypeName
{
    public void Test()
    {
        var a = ""test"";
        string.Equals(a, ""v"");
    }
}";

        var fixtest = @"
class TypeName
{
    public void Test()
    {
        var a = ""test"";
        string.Equals(a, ""v"", System.StringComparison.Ordinal);
    }
}";
        VerifyCSharpFix(test, fixtest);
    }
}
#Publishing the NuGet package
An analyzer published as a NuGet package can be added to a project like any other NuGet package. This is useful because the analyzer will be enabled for every developer of the team and the rules can be enforced on the build machine.
Edit the csproj file to edit the properties of the NuGet package:
csproj (MSBuild project file)
<Project Sdk="Microsoft.NET.Sdk">
    <PropertyGroup>
        <TargetFramework>netstandard1.3</TargetFramework>
        <IncludeBuildOutput>false</IncludeBuildOutput>
        <GeneratePackageOnBuild>True</GeneratePackageOnBuild> <!-- It will generate the NuGet package when you build the project -->
    </PropertyGroup>

    <PropertyGroup>
        <PackageId>MyAnalyzer</PackageId>
        <PackageVersion>1.0.0.0</PackageVersion>
        <Authors>Meziantou</Authors>
        <PackageLicenseUrl>https://LICENSE_URL_HERE_OR_DELETE_THIS_LINE</PackageLicenseUrl>
        <PackageProjectUrl>https://PROJECT_URL_HERE_OR_DELETE_THIS_LINE</PackageProjectUrl>
        <PackageIconUrl>https://ICON_URL_HERE_OR_DELETE_THIS_LINE</PackageIconUrl>
        <RepositoryUrl>https://REPOSITORY_URL_HERE_OR_DELETE_THIS_LINE</RepositoryUrl>
        <PackageRequireLicenseAcceptance>false</PackageRequireLicenseAcceptance>
        <Description>MyAnalyzer</Description>
        <PackageReleaseNotes>Summary of changes made in this release of the package.</PackageReleaseNotes>
        <Copyright>Copyright</Copyright>
        <PackageTags>analyzers</PackageTags>
        <NoPackageAnalysis>true</NoPackageAnalysis>
    </PropertyGroup>

    ...

    <!-- This fragment is included in the template -->
    <!-- It puts the dll in the expected folder of the NuGet package to be recognized as a C# analyzer -->
    <ItemGroup>
        <None Update="tools\*.ps1" CopyToOutputDirectory="Always" Pack="true" PackagePath="" />
        <None Include="$(OutputPath)\$(AssemblyName).dll" Pack="true" PackagePath="analyzers/dotnet/cs" Visible="false" />
    </ItemGroup>

</Project>
Open the URL https://www.nuget.org/, and log in
Click on "Upload a package"
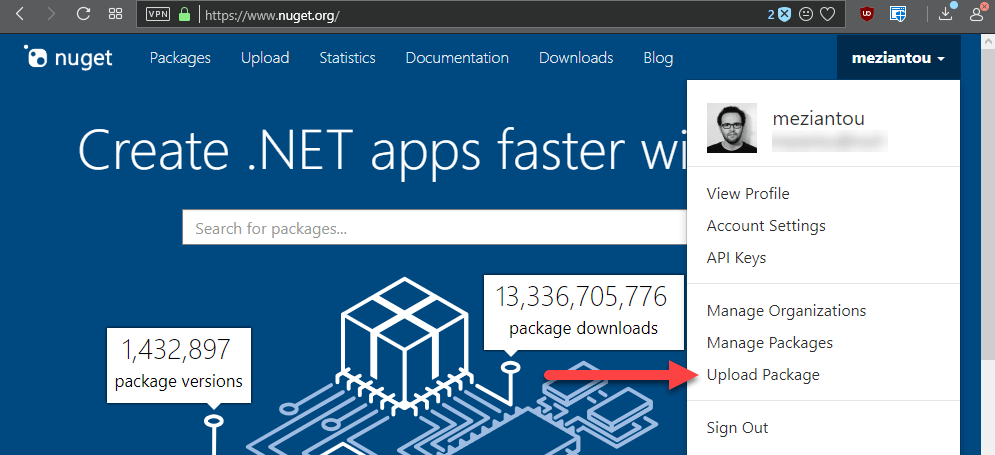
Upload the nupkg file located in the folder MyAnalyzer\bin\release, and validate
After a few minutes, the package should be available on the NuGet gallery.
You can also publish the NuGet package using the command line
#Publishing the Visual Studio extension
An analyzer published as a Visual Studio extension will be installed globally for the current user, across all projects. These analyzers do not run on the build machine or on other developers' machines.
Open the URL https://marketplace.visualstudio.com/
Click on "Publish extensions"
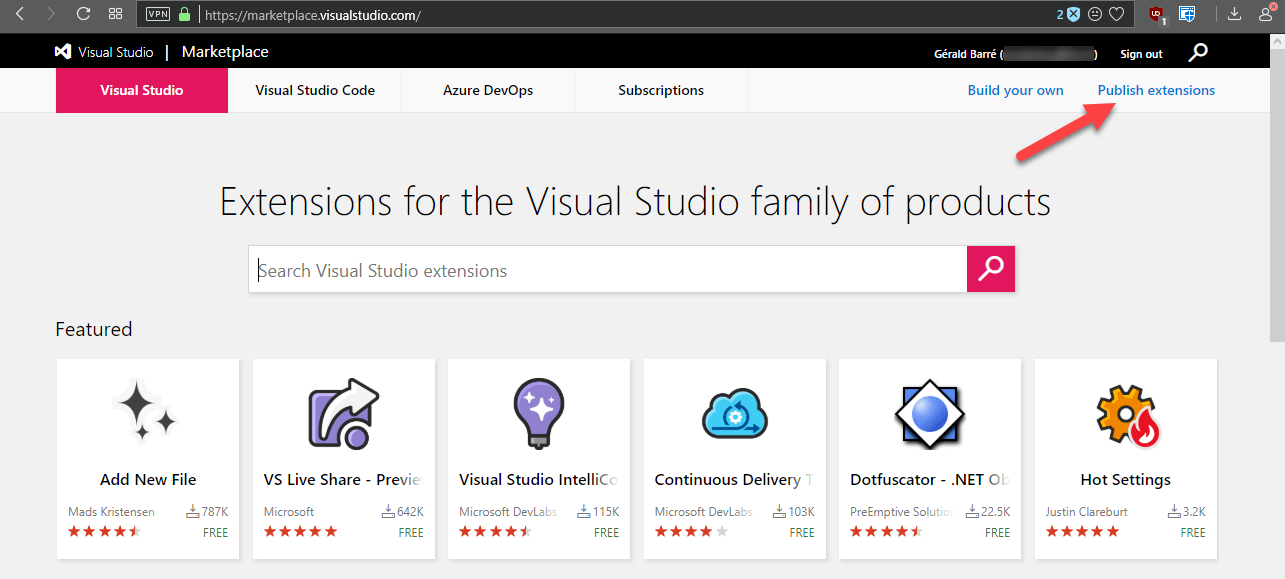 Open the publish Visual Studio extension page
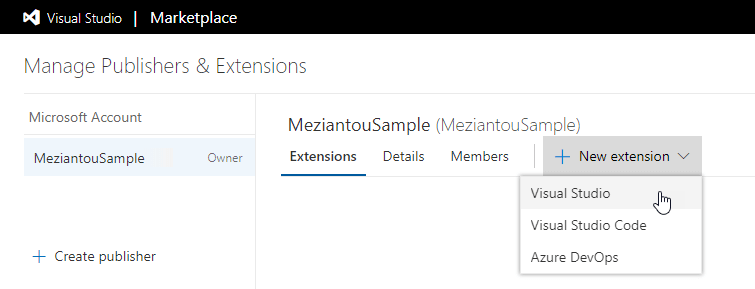
Choose a name for your extension and click on the "Create" button
Click on "New extension" and select "Visual Studio"
 Upload the Visual Studio extension
Upload the VSIX file located in the folder MyAnalyzer.vsix\bin\release, and validate
If your extension passes validation, it will be available in the store.
For any additional details, you can read the documentation about publishing a Visual Studio extension.
#Conclusion
Roslyn analyzers are very powerful tools. They allow you to ensure your team, or the users of your libraries, follow the best practices. They also allow you to provide refactoring capabilities in the Visual Studio editor. The first analyzer will take some time to write, but once you get more familiar with the Roslyn API it will be much easier.
You can get some inspiration from the existing analyzers:
Do you have a question or a suggestion about this post? Contact me!